|
<< Click to Display Table of Contents >> I/O's for PLC mirrors |
  
|
|
<< Click to Display Table of Contents >> I/O's for PLC mirrors |
  
|
When working with PLC mirrors, the Contact dialogue is used to handle I/O's instead of contacts. Even though the procedure is similar to contact mirrors, and the dialogue is almost the same, there still are many differences. Therefore, you will here find a completely separated description of how you handle the I/O's of a PLC mirror using the Contact dialogue.
You can get to the Contact dialogue in two different ways. One is when creating new I/O's, the other when editing existing ones.
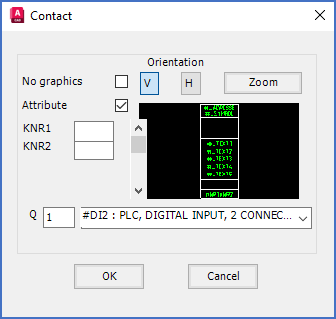
When creating a PLC mirror, the Contacts >> button in the Symbol data dialogue is used to define I/O's, instead of contacts. To create new I/O's, you therefore click the Contacts >> button in the Symbol data dialogue. The Contact dialogue box that is shown in the figure below is then displayed.

Figure 1075: Entering the "Contact" dialogue box when creating a new I/O
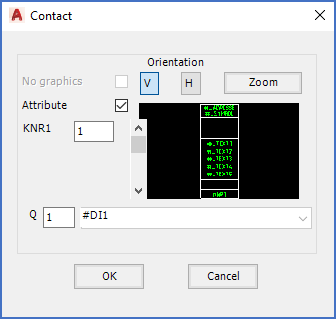
To edit an existing I/O, you double-click the function object of that I/O. The Contact dialogue box will then be displayed, but it will look a little bit different than when creating new I/O's. The reason is that when you create new I/O's, some fields will be empty or have default values when you enter the dialogue, while they will contain existing values when editing existing I/O's.

Figure 1075: Entering the "Contact" dialogue box by double-clicking an existing I/O
You use the dialogue to specify or edit the details of an I/O.
If you are editing an existing I/O, and click the OK button, you exit the dialogue and the changes you have made in the dialogue are transferred to the function object (the I/O).
If you are creating a new I/O, and click the OK button, you can then insert the I/O that you have specified. When that is done, you come back to the Contact dialogue, where you can either define yet another I/O, or click Cancel, if you have defined all the contacts you need.
As you can see, there are quite a few details here to consider. They are described in full detail in separate sub-topics listed below.
•Insert function object for I/O