|
<< Click to Display Table of Contents >> Wire properties |
  
|
|
<< Click to Display Table of Contents >> Wire properties |
  
|

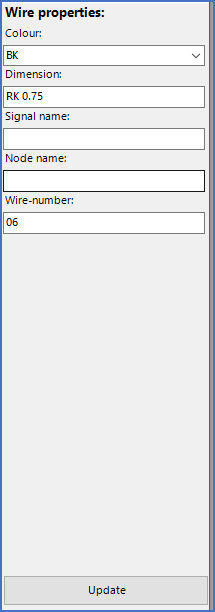
Figure 2153: The "Wire properties" section is found to the right of the wire-list itself.
Wire properties are wire-numbers, dimensions, colours, node names, and signal names. All these properties can be changed with the Wire-list Editor. User-defined properties may also exist, in parallel with several additional standard properties which will soon be added in coming updates. Please refer to the Columns of the wire-list sub-topic, where you will find a description of these properties.
To edit wire properties, please follow the steps described below.
Start by selecting the wires that you want to change the properties for. Use the SHIFT and/or CTRL buttons in a normal Windows manner.
To the right of the actual wire-list, the properties of the selected wires will be presented, as shown in the figure below.

Figure 2154: The "Wire properties" section is found to the right of the actual wire-list.
Properties that are equal for all selected wires will be displayed as shown in the figure above for Colour and Dimension.
If a field is empty in the Wire properties section, like Signal name and Node name in the figure above, the property in question is either not defined, or not equal for all selected wires.
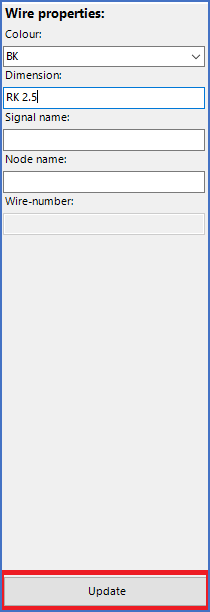
The Wire-number field may also be greyed out, as it is in the figure above. This means that you cannot enter a new wire-number that is equal for all selected wires, for one reason or the other. In most cases, that is because multiple wires in the same wire-chain cannot have the same wire-number, for reasons of ambiguity.
To enter a new property for all selected wires, like a new colour, you first type the desired colour directly in the field in question, or make a selection where that possibility is available, like it is for colour, and then click the Update button, which is shown in the figure below, to transfer the change to the wire-list.
Please note that one further action is needed to transfer the change to the circuit diagrams, namely to click the Apply button in the lower right corner.

Figure 2155: The "Update" button is placed in the bottom of the "Wire properties" section.
Details about the fields and the buttons of the Wire properties section and how to use them for editing are presented in the sub-topics that are listed below.
•The Colour field
•The Dimension field
•The Signal name field
•The Node name field
•The Wire-number field
•The Update button
•Transferring changed properties to the circuit diagram
•Save or restore changed wire properties