|
<< Click to Display Table of Contents >> Node name |
  
|
|
<< Click to Display Table of Contents >> Node name |
  
|
In a similar manner as described in the previous sub-topic for Dimension, you can change Node name.
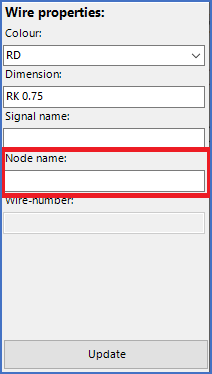
You define a Node name by typing it in the field that is available for the purpose to the right. The figure below shows this field.

Figure 2167: The "Node name" field
Node name is intended as a common designation for all the wires of a wire-chain. In practice, it would therefore be very strange if you had different node names within the same wire-chain. However, cadett ELSA does not prevent you from defining it that way, which open this field for other uses than the initially intended one.
When you click the Update button in the bottom of the Wire properties section, all the properties that you have entered above the button are transferred to the wires that you have selected. This means, that it is possible to change multiple properties at once, for example both signal name and node name.
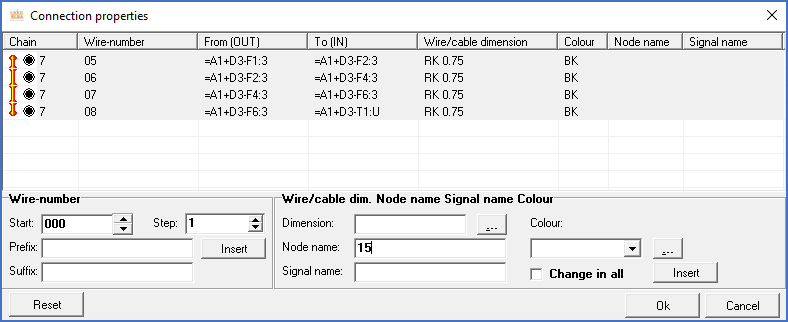
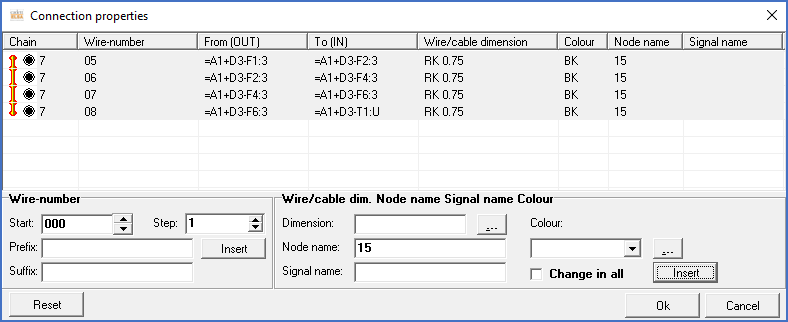
The figures below, shows an example where four wires are given a Node name (15).

Figure 2168: Four wires have been selected and a new node name ("15") has been typed in the "Node name" field.

Figure 2169: After pressing the "Update" button, the specified node name is visible for all four wires in the wire-list.
Finally, you can transfer all changes to the circuit diagrams using the Apply button in the lower right corner of the dialogue.