|
<< Click to Display Table of Contents >> Colour |
  
|
|
<< Click to Display Table of Contents >> Colour |
  
|
To be able to define colours for individual wires, the wiring must of course be unambiguously defined. In other words, your wires must have wire-numbers, and those wire-numbers must be defined in the circuit diagrams. Otherwise, the colour information has nowhere to be saved.
Below, we assume that wire-numbers have been correctly defined, and that you therefore can define any colours that you like for any wires that you like.

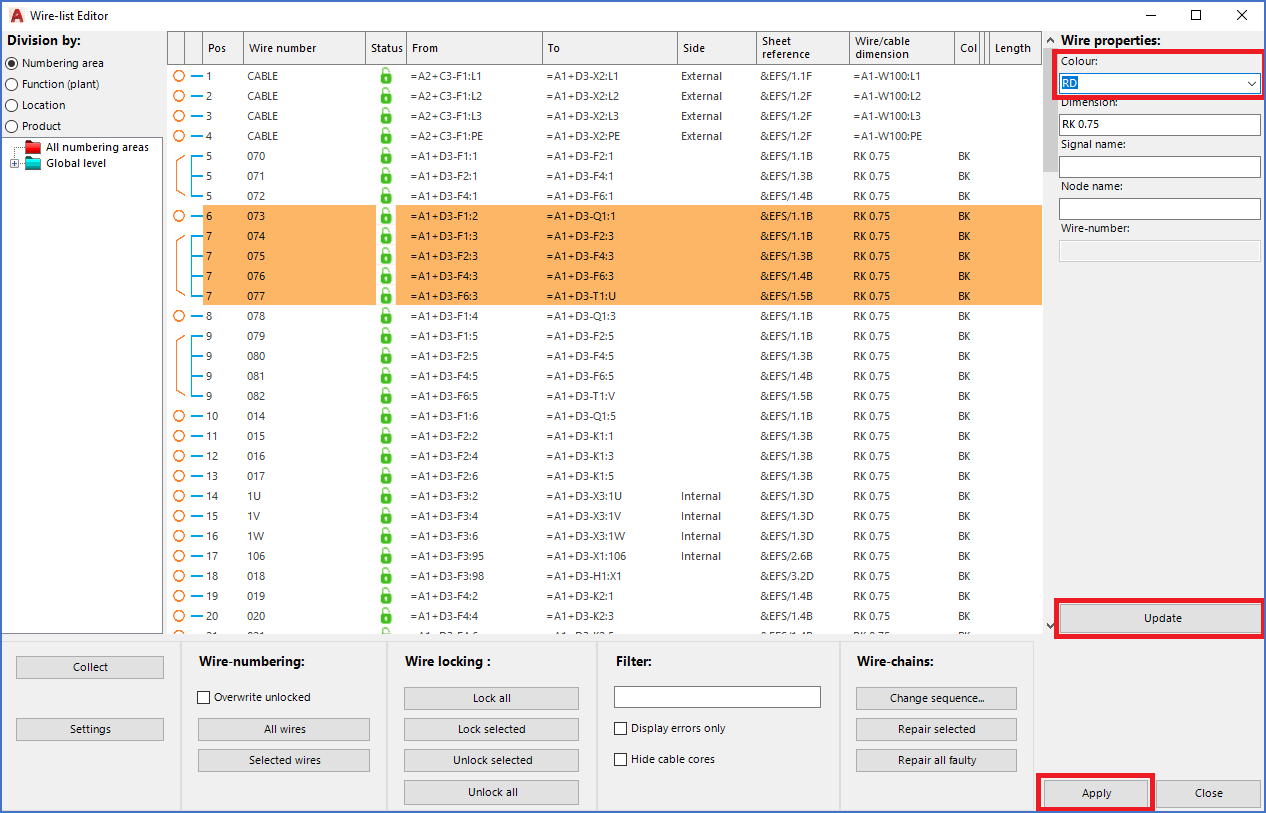
Figure 2156: To change colour in the wire-list, select the wires, enter the desired colour, and click the "Update" button.
Step number one in this process, is to select the wires that you want to give a new colour to. Please note, that they will all get the same colour. If you want to specify different colours for different wires, you have to do that step by step, or more correctly, colour by colour.
So, using ordinary Windows features like SHIFT and CTRL, you select a set of wires. That selection can be made easier by first applying a suitable filter, thereby reducing the size of the displayed wire-list and thus simplifying the selection.
If all selected wires currently have the same colour, that colour will be presented in the Colour field to the right. If not, the Colour field will be empty. Regardless of that, you can then enter the new colour directly in the Colour field.
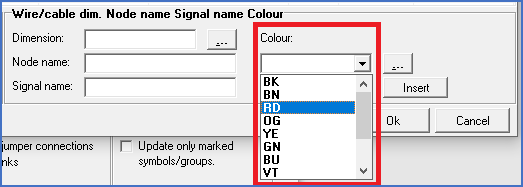
You can either type the name or abbreviation for the desired colour, or select it in a drop-down list.

Figure 2157: Colour selection through selection list
As default, you can choose between colour codes according to the DIN47100 standard. It is, however, possible to extend the list of available colours. How that is done, is explained in the sub-topic listed below.
•Editing the list of selectable colours
After specifying the colour, you click the Update button below, whereby the entered colour will be transferred to the wire-list, as shown in the figure below.
To transfer your changes from the wire-list to the circuit diagrams, as always, you have to use the Apply button in the lower right corner of the dialogue.

Figure 2158: The colour has been changed for the selected wires. The next step is to transfer the changes from the wire-list to the circuit diagrams using the "Apply" button.