|
<< Click to Display Table of Contents >> Insert main symbol |
  
|
|
<< Click to Display Table of Contents >> Insert main symbol |
  
|
The associated and selected symbols are then inserted one by one, in the order that they are defined in the catalogue, normally with a main symbol first, a possible contact mirror thereafter, and finally any help symbols that may also be included.
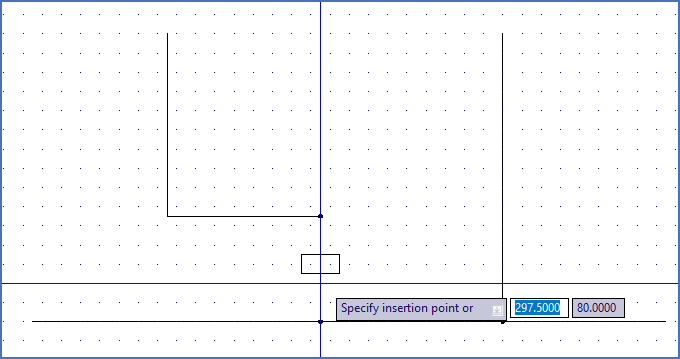
You therefore first place the main symbol where you want it to be, like a coil from the example presented above, as shown in the figure below.

Figure 933: The symbol is placed properly.
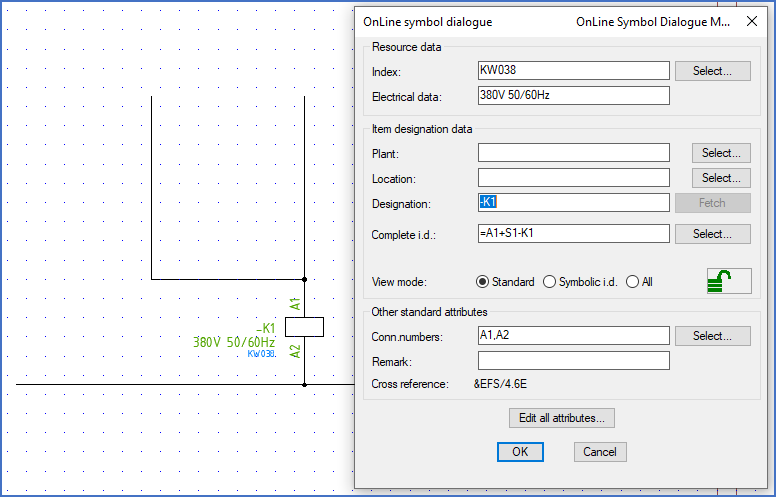
An automatic line break will be performed.

Figure 934: Line break is performed; index and electrical data are entered, and a default item designation is generated automatically.
Please note that Index and Electrical data will be assigned automatically, which you will see directly in the dialogue box that appears, directly after you have placed the symbol where you want it to be, as shown in the figure above.
At the same time, a default item designation will be created automatically, provided of course that you have activated Automatic item designation generation. The first available item designation will be presented as default, for instance –K1. You can confirm the default or change it to something else. When you press <RETURN> after making any changes, you will see the complete item designation, calculated with all surroundings in the drawing sheet considered, presented in the lower part of the dialogue box.
Click the OK button to confirm.
Next, when applicable, you will Insert contact mirrors and help symbols.