|
<< Click to Display Table of Contents >> Change a segment |
  
|
|
<< Click to Display Table of Contents >> Change a segment |
  
|

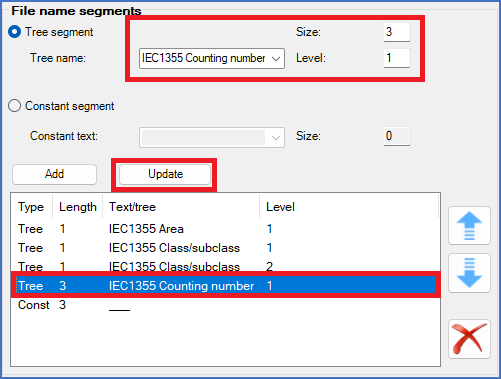
Figure 304: To change a segment, select it, edit the details, and then click the "Update" button.
To change the content of a segment, like changing the length of it or to make any other change, first select the segment in question by clicking it the ordinary way.
The details of the selected segment are then displayed in the upper part of the File name segments section, as shown in the figure above. Please adjust them according to your wishes. For a Constant, you can change the Constant text and thereby indirectly also the Size. For a Tree segment, you can change the Tree name, the Size and the Level. Please note that those values must match the actual document code definitions of the project.
When you have adjusted the details of the selected segment as described above, you click the Update button for your changes to take effect. Please refer to the figure above.
Technical detail
The operation that is described in this topic was not possible in cadett ELSA R41 and earlier. In those versions, it was necessary to create a new segment to replace the old one.