|
<< Click to Display Table of Contents >> Procedure to update old existing symbols |
  
|
|
<< Click to Display Table of Contents >> Procedure to update old existing symbols |
  
|
The procedure for updating existing symbols, so that they are given correct versions and are connected together in a group allowing to use all the now available new features, is described in the following.
•The first symbol - for example a vertical one - is first inserted in free air.
•The Symbol Generator is then used to edit the symbol. Please make sure - as always - that you have enough space in the drawing sheet to avoid accidentally including surrounding objects in the symbol when saving it later on.
•Since the version has not yet been defined, it will have the value General (ABCDEFGH), before you adjust it.

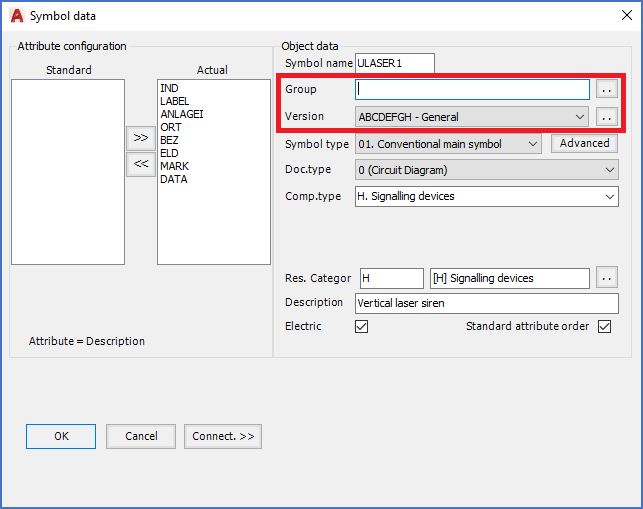
Figure 1298: An old existing symbol will look like this when edited in the Symbol Generator
•Change to the correct version, for example Vertical (ACEG), for a vertical symbol.
•Specify a group name that is not already in use, for example a part of the symbol name.

Figure 1299: The group name of the first symbol in a group is specified manually, by typing it.
•Save the symbol.
•Then, you insert the next symbol which should be part of the same group, for example the horizontal version of the same basic symbol. This symbol should of course also be inserted in free air, with the same limitations as for the vertical symbol.
•Edit the symbol with the Symbol Generator.
•Specify the correct version, like Horizontal (BDFH).
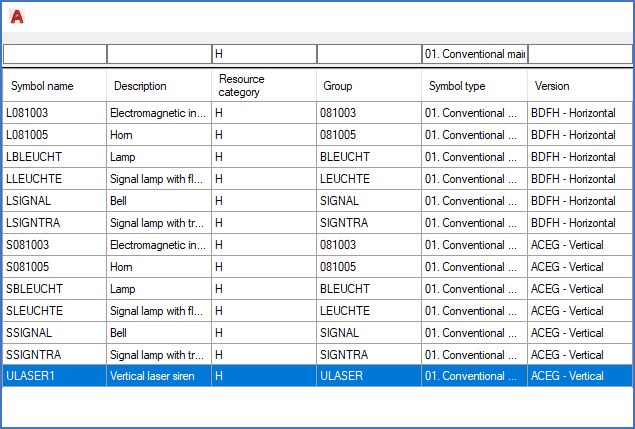
•The group name should be the same as for the other symbol. You can of course type this name, but it is easy to forget the exact spelling. Therefore, it is often a better option to use the Select button. With that, you select a symbol that belongs to the same group, in this case the vertical version, and you will thereby automatically get the group name from that symbol.

Figure 1300: The Select button shown here can be used to select a symbol to automatically get the group name from that symbol, instead of typing the group name.

Figure 1301: A dialogue like this one enables you to select a symbol belonging to the same group, instead of typing the group name.

Figure 1302: Both "Group" and "Version" have been specified.
•Save the symbol.
•You can then test inserting the now updated symbol. You will find that you can switch between the versions using the <SPACE> bar in the same way as with standard symbols, and the AutoLine feature will be available all the way.