|
<< Click to Display Table of Contents >> Example of automatic terminal numbering |
  
|
|
<< Click to Display Table of Contents >> Example of automatic terminal numbering |
  
|
The example starts with a few vertical three-phase lines, upon which terminals are inserted.

Figure 1623: The example starts from here
Thereafter, with the terminal command, the three first lines are selected, so that a terminal group containing three terminals is created.
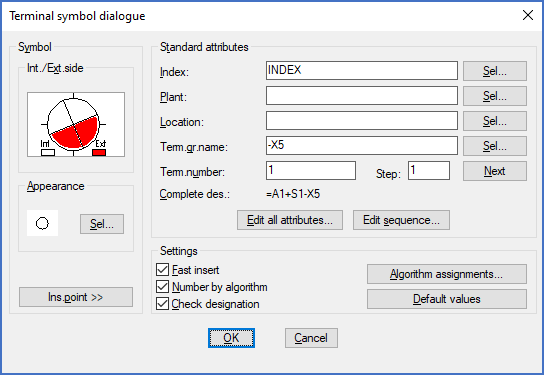
Figure 1624: The "Terminal symbol dialogue"
A terminal group name that has not been used in the current project before is entered. In this example –X5 has been chosen, as shown in the figure above.
An algorithm assignment for the –X5 terminal group is then created using the Algorithm assignments… button in the lower right corner of the dialogue box.
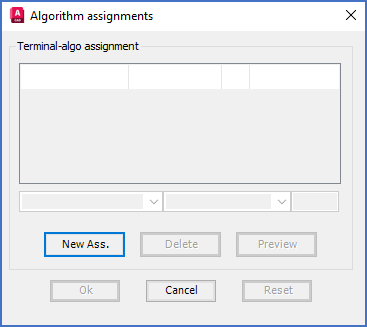
Figure 1625: When you first enter the Algorithm assignments dialogue box, it will probably be empty, like shown here.
If no assignments have been made in the project yet, the table of assignments in the dialogue will be empty, as shown in the figure above.
Please note that the table you see here is identical with the one that is shown in the project parameters and which is described in the Numbering algorithm assignments topic. There are simply two separate ways available, to access the same information.
To insert a new row in the table, the New Ass. button is pressed.
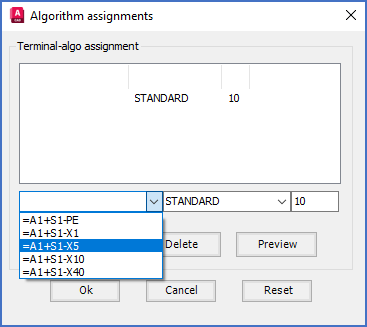
Figure 1626: Selection of "Terminal group name"
The Terminal group name may be typed immediately or – even simpler – selected it in a drop-down list. A nice thing is that the Terminal group name that was specified in the Terminal dialogue box the moment before is among the ones that you can select.
Sometimes, depending on the exact sequence of your clicks, the newly entered Terminal group name will not be available to select. If so, you can click the Cancel button, and then the Algorithm assignments… button once again. The list of Terminal groups will then be updated, and the Terminal group name in question will be available to select.
The figure above shows how the –X5 terminal group name is selected.
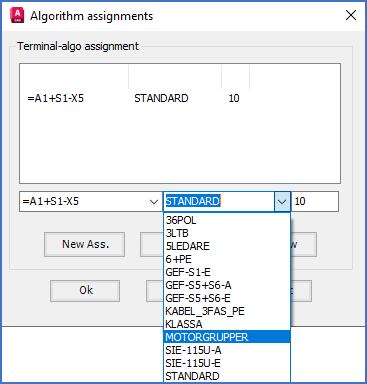
Figure 1627: Selection of "Numbering algorithm"
In a similar way, the Numbering algorithm can be selected in a drop-down list that contains all available Numbering algorithms. Please refer to the figure above.
Finally, a suitable Limit is specified in the box furthest to the right. The Limit is the total number of terminals in the Terminal group in question.
With the Preview button, you can check whether the result of your specifications is what you expect it to be.
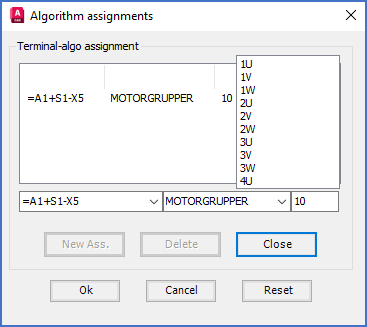
Figure 1628: Check the result using the “Preview” button.
The figure above shows how this might look. In this case, the Limit seems to be a little strange. It has been set to 10 but should rather have been 9.
To rectify this, you can click the Close button, change the Limit to 9, and then click the Preview button again.
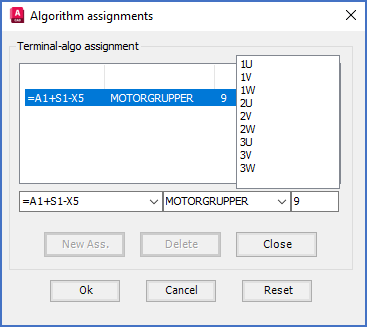
Figure 1629: Preview after adjusting the limit
The procedure is finished by saving the settings using the Ok button.
When you click the Ok button, you return to the Terminal symbol dialogue, in which you will find the previous start value, normally 1, remaining. The reason for this is that the initial start value is kept until you actively change it, preferably by searching the newly selected algorithm for a suitable value. Therefore, you need to click the Next button. The selected algorithm will then be searched for the current terminal number (likely 1) to find the next free number after that. This will however be unsuccessful since 1 is not part of the selected algorithm. This failure is shown with ??? , as shown in the figure below.
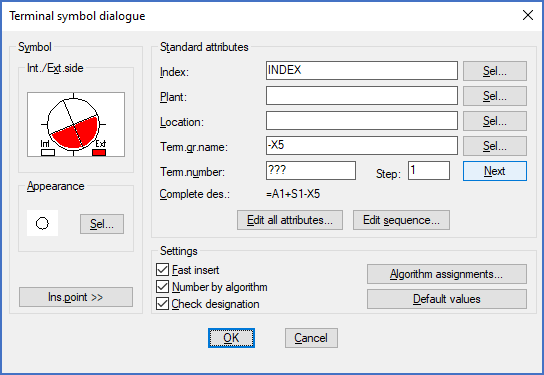
Figure 1630: In a case like this, click “Next” once more.
In this situation, you can click the Next button once more. This means that you will start all over again in the algorithm, and the very first value will show up. The question marks symbolised that you were “outside” of the algorithm. To step forward in that situation simply means that you start from the beginning, and that is of course exactly what you wish to do here.
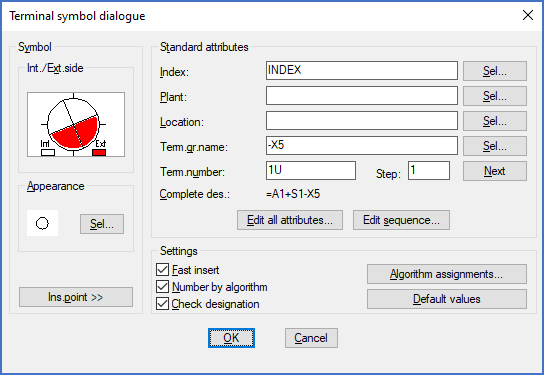
Figure 1631: The first value from the selected algorithm has been inserted.
You can then check Fast insert and click OK.
All terminals are then inserted directly, and numbered automatically.
Existing terminals are considered, and the next available terminal number for each inserted terminal is always suggested, even when several terminals are inserted at the same time.
If the terminals in a Terminal group is running short, meaning that all available terminal numbers are occupied, remaining terminals will be given ??? as terminal number, which makes it crystal clear what the situation is.