|
<< Click to Display Table of Contents >> Create a new project |
  
|
|
<< Click to Display Table of Contents >> Create a new project |
  
|
You create a new project by first selecting an existing project to use as template, or "prototype". You then invoke the New project feature.
To select a project, you do not need to open it. Simply left-clicking it in the detailed list to the right, without opening the project, is enough.
Please note, that to select a project without opening it, you must first open the group that the project is located in. When you have done that, the project will be displayed both in the tree structure to the left, and in the detailed list to the right. You can then select the project with a left-click, either in the tree structure or in the detailed list.
Opening the project, for example using double-click, will also select it, but as explained above, it is not necessary to do that.
Any project may be used as prototype for creating a new project, but using a dedicated prototype project may in many cases be the best choice.
When a project has been selected, you can click the New button in the toolbar below. A dialogue box used to create new projects is then displayed where you can enter the information that is needed for the new project.
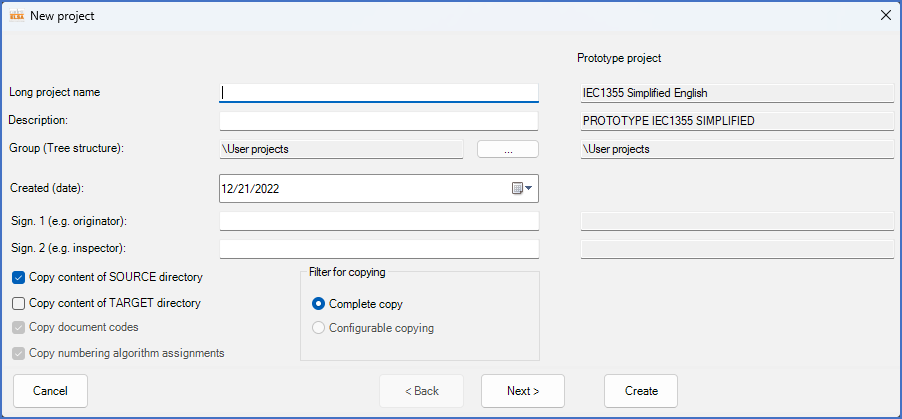
Figure 63: The dialogue box that is used to create new projects
Typically, you enter a name for the project in the Long project name field and a description in the Description field.
In the Group (Tree structure) field, you specify where in the tree structure you want the project to be located. Please note that if you select a new location using the select button, the default location that comes from the prototype project will be replaced entirely. That is a behaviour that differs from the old Project Module of cadett ELSA R41 and earlier, if you were familiar with that.
It is also common to specify signatures and date at this stage.
The next step is to decide whether or not any of the possible content of the prototype project should be copied to the new project.
You have four check-boxes available in the lower left corner of the dialogue box, to specify which content to copy.
If you leave all these check-boxes unchecked, the new project will be empty, but the project parameters will be identical with the prototype.
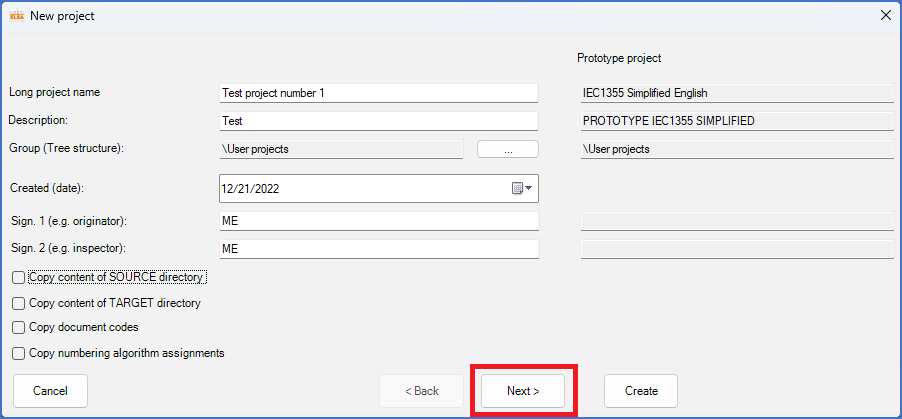
Figure 64: The first step in creating a new project
When that is done, you have two choices. Either you create the project directly with the Create button, or you continue to define more details using the
Next button, as shown in the figure above.
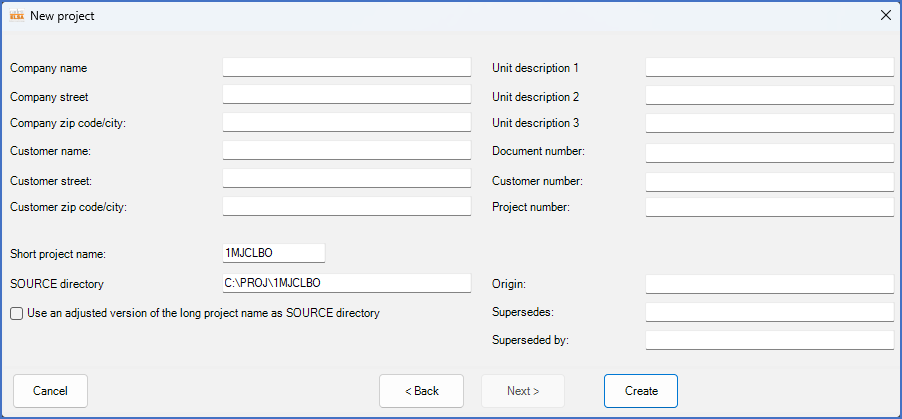
Figure 65: In the second step of the creation of a new project, you can add text information to project parameters, adjust "short project name" and "SOURCE directory".
In the second step in the process of creating a new project, you can define project parameters with pure text information, like unit descriptions, document number and similar. Please refer to the figure above.
In that step, you are also presented with a default short project name, created as a time stamp, to guarantee that it is unique. If you want to, you can adjust the short project name, but you are recommended not to.
A default SOURCE directory is presented as well, based on the short or the long project name, according to the check-box in the lower left corner labelled Use an adjusted version of the long project name as SOURCE directory.
To create the project, you click the Create button, as shown in the figure below.
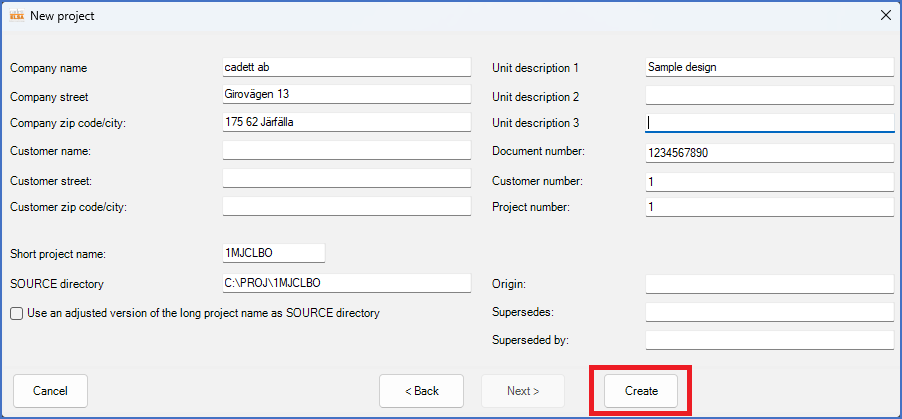
Figure 66: The "Create" button is used to create the new project.
The new project is created and opened. It is then ready for use.
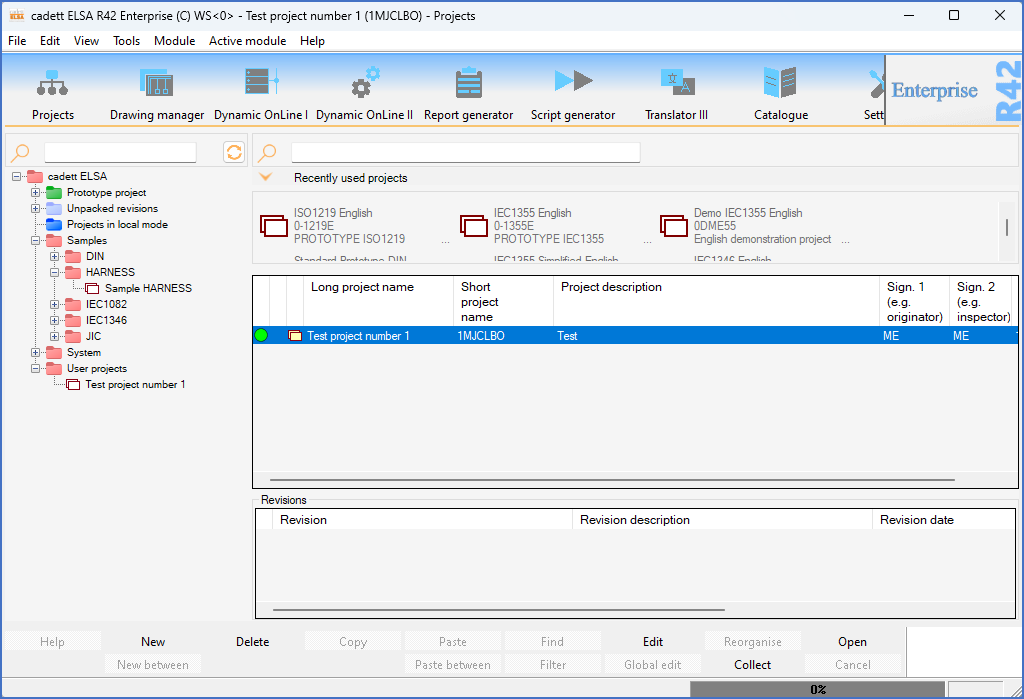
Figure 67: The new project has been created, opened, and is ready to use.
Please refer to the Create new project topic for more details about creating new projects.