|
<< Click to Display Table of Contents >> Check-in for TRAVEL (legacy) |
  
|
|
<< Click to Display Table of Contents >> Check-in for TRAVEL (legacy) |
  
|
Check-in for TRAVEL (legacy) is used to check-in a project that has previously been checked-out. This is done from a workstation of a network installation of cadett ELSA.
When you are ready with your work in a local installation, with one or multiple projects, which have been checked-out from a network installation and imported to the local installation, it is time to bring those projects back. That process is discussed here.
Doing so is a two step process. The first step is to export the projects from the local installation. The second step is to check-in the projects to the network installation.
First, start the local cadett ELSA, select the projects in question, right-click and select Backup (export projects)...
A detailed description of the export and import feature that is used to import projects to and export them from the local installation is available in a topic named Backup and restore projects (EZP).
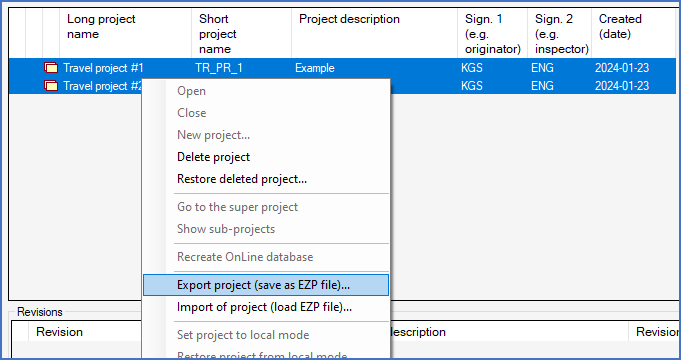
Figure 233: Select the projects that you are ready with, right-click and select "Export project (save as EZP file)...".
In the upper left part of the dialogue that is presented, you can select the directory where you want to place the EZP files. A select button is available for that purpose. Please refer to the figure below.

Figure 234: Selection of directory to save the EZP files in
When you have properly defined the directory to save the projects in, either click the Export all listed projects button, or first select the projects that you want to save, and then click the Export selected projects button. The latter alternative is of course handy if you for example want to save the projects in separate directories, or something like that, so that it is inconvenient to save them all at once.
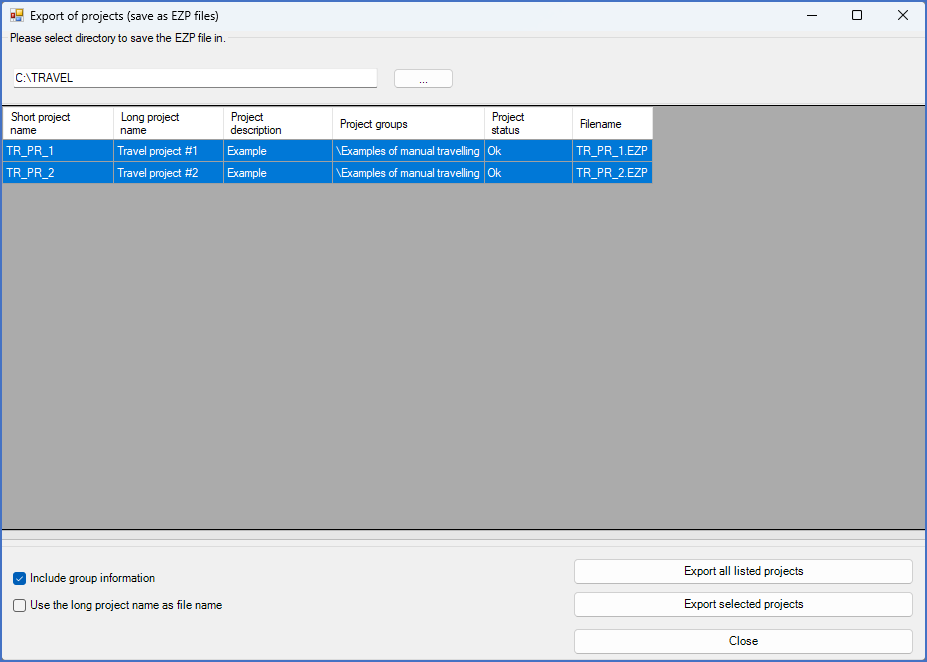
Figure 235: This is the main dialogue box used for exporting projects as EZP files.
If the original EZP files from the import is still present in the same directory, they of course must be overwritten. A message box, like the one shown in the figure below, will inform you of that.
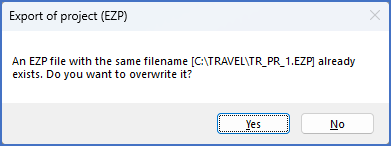
Figure 236: This dialogue box is displayed once for each EZP files that will be overwritten.
The message box will be repeated once for each existing EZP file that will be overwritten.
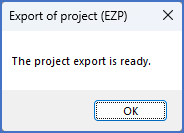
Figure 237: This message box confirms that the projects have been exported.
When all selected projects have been exported, another message box, like the one in the figure above, will inform you of that.
It is then time for the second step of the check-in process, namely to do the actual check-in. For that purpose, you need to exit your local cadett ELSA, and instead start a workstation of the network installation. As has already been mentioned, that may be on the same computer, but it may also be on another. In the latter case, placing the EZP files differently, copying or otherwise transferring the files, might be necessary.
When running the workstation of the network installation of cadett ELSA, you select the projects that you want to check-in, right-click, select Project travelling in the context menu, and finally Check-in from Travel in the sub-menu that appears.
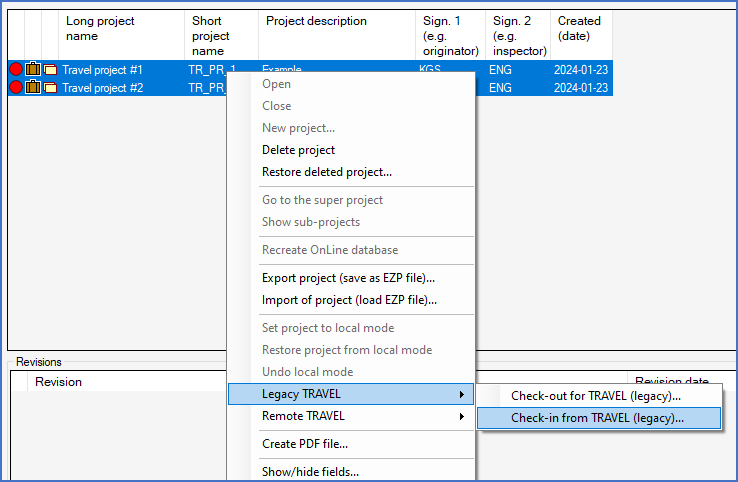
Figure 238: You select "Legacy TRAVEL" and "Check-in from TRAVEL (legacy)..." to check-in projects that were previously checked-out.
A dialogue box, like shown in the figure below, lets you select the directory where the EZP files are located.
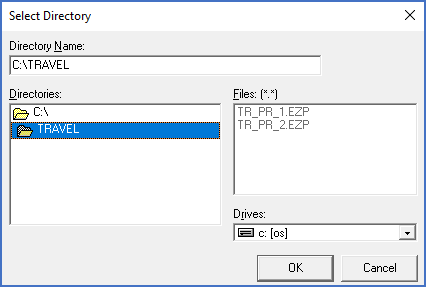
Figure 239: This dialogue box is used to select the directory where you have put the EZP files that were exported from the local installation.
Click OK when you have chosen the correct directory.
The selected projects will then be checked-in to the server, which means that the content of the project on the server will be replaced with the content from your local installation, that was transferred with the EZP files. After that, the projects will be unlocked.

Figure 240: The two projects that were checked-out before, have been returned to the network installation, when they were checked in.
The projects are then available for all users in the network installation.
Please note that a much more convenient travelling method is available in cadett ELSA Enterprise. That feature is called Remote TRAVEL.