|
<< Click to Display Table of Contents >> OnLine Protocol |
  
|
|
<< Click to Display Table of Contents >> OnLine Protocol |
  
|
The OnLine Protocol is maybe the most prominent error finding tool in cadett ELSA. It is powerful, effective, and easy to use.

Figure 1366: The "OnLine Protocol…" command is found in the “Tools” panel of the “Drawing Aids” tab in the ribbon menu.
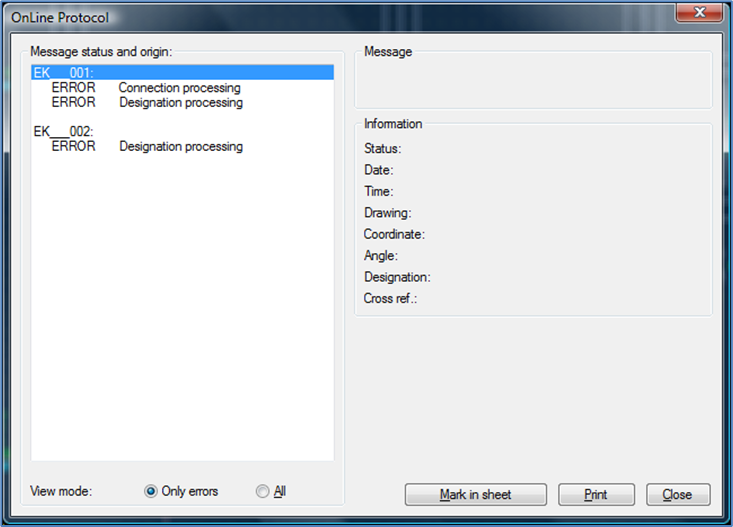
You can check the OnLine Protocol any time you like during the design process. You select the command in the Tools panel of the Drawing aids tab in the ribbon menu. A dialogue box will then appear listing the current errors in the project. The list does not only include errors in the current drawing sheet but the errors of all drawing sheets in the entire project. The list might be very long, especially in big projects.
To make it easier for you navigate between the errors, the messages are grouped by drawing sheet. When you activate the dialogue box, focus will always be on the errors of the current sheet, regardless of where in the project you happen to be.
The description of each error in the left part of the dialogue box is very brief.

Figure 1367: Example of an error list in the “OnLine Protocol”
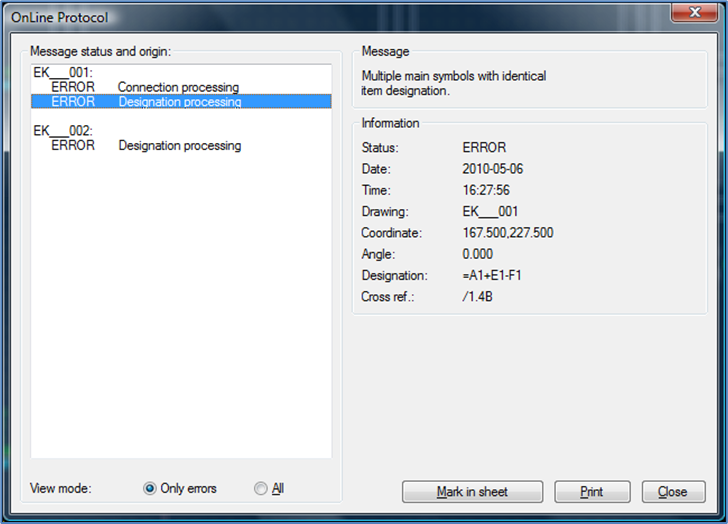
If you would like a more detailed description of an error, you simply select the error message in question, with a single left mouse click. In the right part of the dialogue box, you will be provided with detailed information about the error, including where it is found. For each error information is provided of in which drawing sheet, and where in that sheet the error in question is located. The drawing sheet is defined by its filename. The position in the sheet is defined by x and y coordinates within the sheet. Moreover, you will be provided with a cross-reference, where the position is defined according to the current configuration of cross-references in the project in question. That might for example be sheet number, column, and row. When applicable, an item designation is specified, which is important when an error concerns a symbol of some kind.

Figure 1368: An error is selected to the left. More detailed information is presented to the right.
The OnLine Protocol is truly OnLine. When you make a correction, the corrected error will automatically disappear from the list.
Mark in sheet is a very powerful feature – especially if the number of drawing sheets in your project is large, which it probably normally is. It is used as follows:
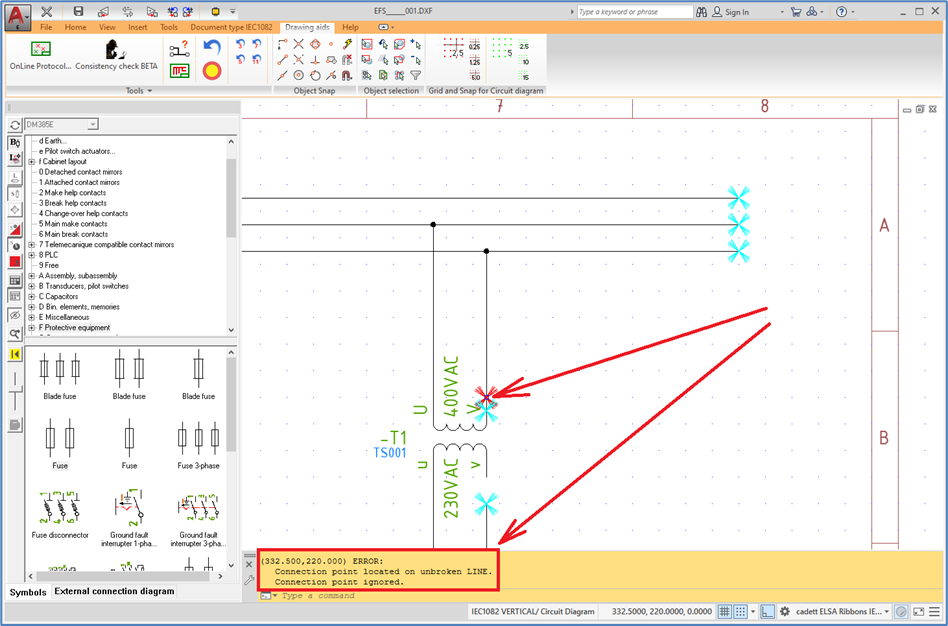
Select the OnLine Protocol from the Tools panel of the Drawing aids tab in the ribbon menu. Select the error that you are interested in by clicking it. If the error in question is found in the current sheet or not does not matter. Click the Mark in sheet button. If the error is found in another drawing sheet than the current one, you are automatically brought to that sheet. During the sheet shift process, you must answer a question of whether to save the current sheet or not. All errors and warnings in the sheet that you shift to are marked graphically on the screen with crosses. Light blue (cyan) crosses define warnings, while red crosses are used to define errors. You can move the cursor to one of the crosses. Do not click. Simply move the cursor to the cross and hover over it. The corresponding error message is then directly presented on the command line.

Figure 1369: The cursor is hovering over the red cross and the associated error message is displayed on the command line.
In this way, you can easily identify errors and warnings.
To exit this presentation mode, you press the <RETURN> key. You are then able to correct the error using all available commands.
When you have corrected an error, you may of course want to check if it in fact has disappeared from the OnLine Protocol. To do that, select the OnLine Protocol command once again. You can then see that the error list has been updated, and the error which you have corrected is gone.

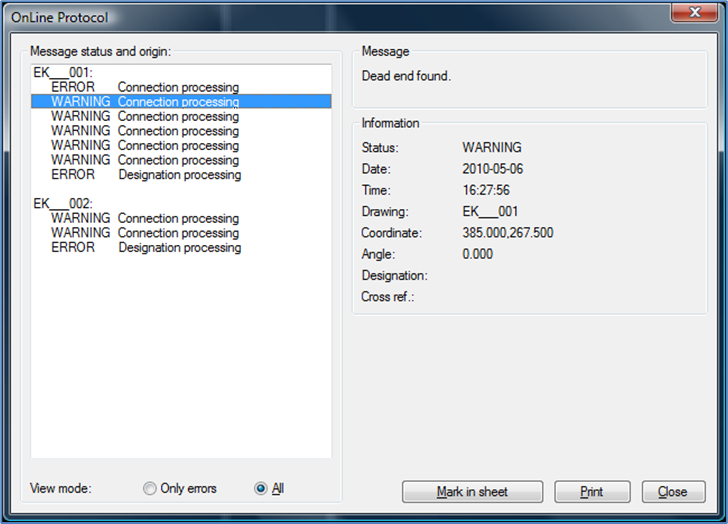
Figure 1370: The “OnLine Protocol” with both errors and warnings
Below the error list in the dialogue box of the Online Protocol, you can select View mode, using a pair of radio buttons. The alternatives are Only errors and All. If the Only errors option is activated, only sheer faults will be shown in the error list. If, on the other hand, the second option - All – is activated, warnings will be added to the list, alongside the errors. Warnings refer to circumstances that might be errors but could also be perfectly correct. For instance, this may concern a line ending into empty air. That could be an unsuccessful attempt to connect to a symbol, but it could also be perfectly fine.