|
<< Click to Display Table of Contents >> Creating a new Insert logotype setting, example |
  
|
|
<< Click to Display Table of Contents >> Creating a new Insert logotype setting, example |
  
|
As an example of how the Insert logotype setting feature works, we assume that you want to add a logotype block in the title field of your drawing sheets when the PDF file is created. The drawing sheets will not be saved with the logotype in them, thus reducing file size and making it easy to switch the logotype when needed.
Let us assume that you have a WBLOCK (a DWG file) called MYLOGO.DWG that you want to use for this purpose.
First, you need to test inserting the logotype manually in your title filed, to find the best X and Y coordinates for the insertion, as well as the scale factor that needs to be applied in order for the logotype to fit the title field. Please make a note of the coordinates and the scale factor. If the logotype needs to be rotated, please make a note of the rotation angle as well. No rotation is defined as 0 degrees.
Next, you have to decide where to place the DWG file. To make updates of the software as smooth as possible, it is a good idea to place it in the symbol library that you use, like for instance IEC1082. If you do that, the logotype will be transferred automatically to the new version when you update the software, and you do not need to make any adjustments, if you move the software to another server, workstation or similar, where the search paths may be different.
If you - for one reason or another - want a different location, that is supported as well. In this example however, we assume that you place the DWG file for the logotype in the symbol library by simply copying the file there.
In the Insert logotype tab, you will now create an Insert logotype setting, which specifies the logotype to insert and how it should be inserted.
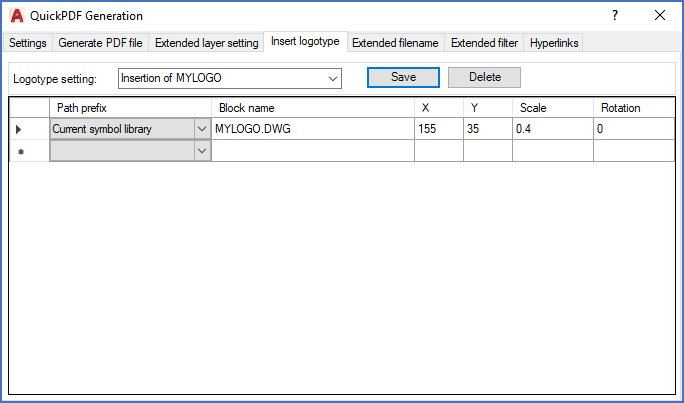
Let us assume, as an example, that you have found out that your logotype should be inserted in “155.0, 35.0” (x=155.0 and Y=35.0) with a scale factor of 0.4 and a rotation of 0.
Please proceed in the following way:
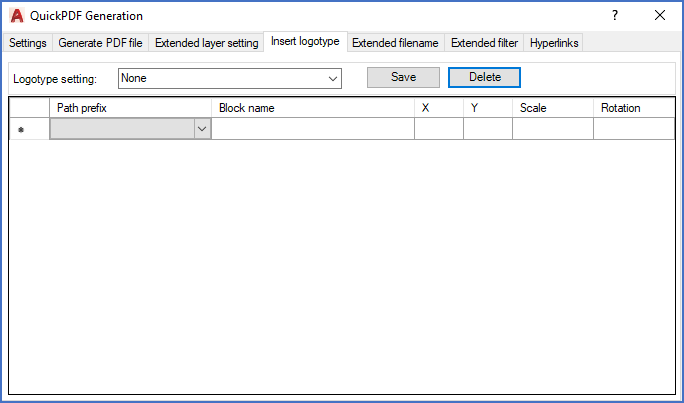
1.Activate the Insert logotype tab.

Figure 1382: The Insert logotype tab.
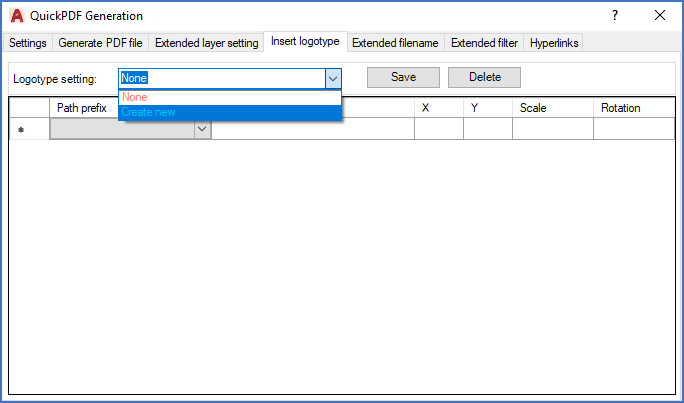
2.Using the drop-down menu for the Logotype setting field, please select Create new as shown in the figure below.

Figure 1383: Select Create new.
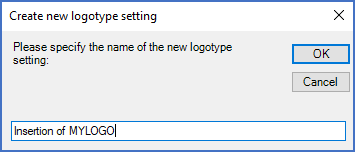
3.In the dialogue that is presented, please specify a suitable name for the Insert logotype setting that you are about to create, as shown in the figure below.

Figure 1384: In this dialogue box, the name of a new Insert logotype setting is specified.
4.Click OK.
5.In the Path prefix column of the table in the lower part of the tab, please select Current symbol library, as discussed above.

Figure 1385: Insertion of a logotype has been specified.
6.In the Block name column, please specify the filename of the block, in our example MYLOGO.DWG.
7.In the X and Y columns, please specify the X and Y coordinates of the insertion point for your logotype. Please note that point (“.”) should be used as decimal separator.
8.In the Scale column, please specify the scale factor, in our example 0.4. Please note that point should be used as decimal separator. Original scale is accomplished by specifying the scale as “1”.
9.In the Rotation column, please specify the rotation of the logotype at insertion. If no rotation is needed, please specify that as “0”.
10.If you want to insert more than one block, please add the information for additional blocks in the rows below the first one. In this example, we do not need that.
11.Click the Save button to save your new Insert logotype setting.