|
<< Click to Display Table of Contents >> Creating a new extended layer setting, example |
  
|
|
<< Click to Display Table of Contents >> Creating a new extended layer setting, example |
  
|
As an example of how the extended layer-setting feature works, we assume that none of the six available standard layer settings fulfils your needs. In that situation, you should start with finding the one that is closest to your preferences.
Let us assume that layer setting 5 - PLOT with wire no. and cables is the one that is “least bad” for you.
In the Settings tab, you will therefore specify that layer setting.
In the Extended layer settings tab, you will then create an extended layer setting that specifies the differences between the selected standard layer setting and your preferences.
Let us assume, as an example, that you want layer INDEX to be ON and layer KSP_L to be OFF and FROZEN, which differs from layer setting number 5.
Please continue in the following way:
1.Activate the Extended layer settings tab.
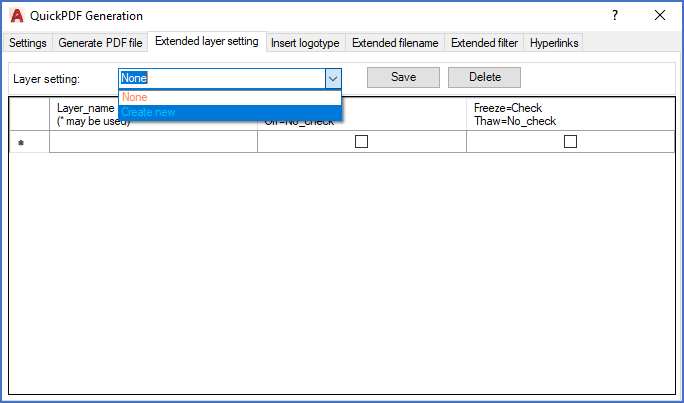
2.Using the drop-down list for the Layer setting field, please select Create new as shown in the figure below.

Figure 1374: Select "Create new".
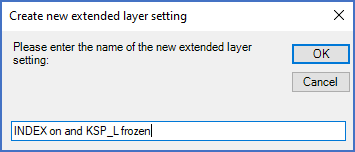
3.In the dialogue that is presented, please specify a suitable name for the extended layer setting that you are about to create, as shown in the figure below.

Figure 1375: In this dialogue box, the name of a new extended layer setting is specified.
4.Click OK.
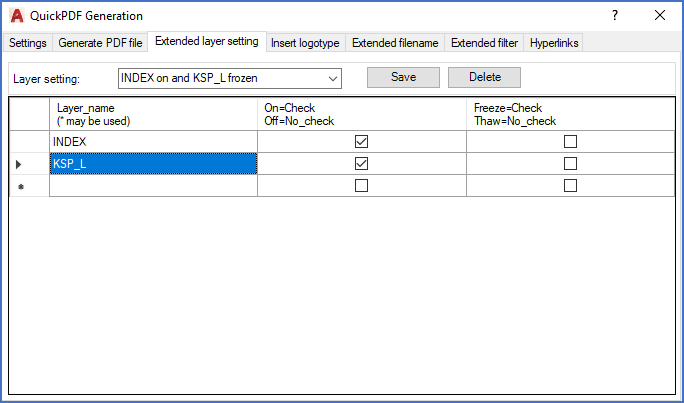
5.In the Layer name column of the table in the lower part of the tab, please specify the names of the layers that you want to affect, as shown in the figure below.

Figure 1376: Two layer names have been added.
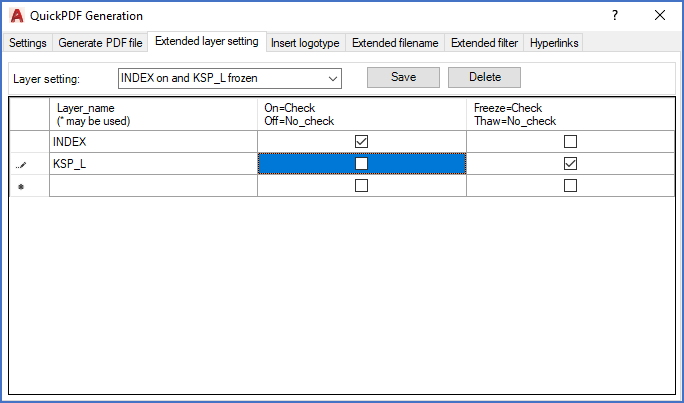
6.In the On/Off and Freeze/Thaw columns, please select what you want to do with the layers that you have specified.

Figure 1377: The desired status of the layers in the table is specified with check boxes.
7.In this example for layer INDEX, please check On/Off and uncheck Freeze/Thaw. That will leave layer INDEX ON and THAWED.
8.For layer KSP_L, please uncheck On/Off and check Freeze/Thaw. That will leave layer KSP_L OFF and FROZEN.
9.Click the Save button to save your new extended layer setting.