<< Click to Display Table of Contents >> Connector-pin |
A general description of connectors is found in the General description of connectors sub-topic. Please read that first, for a better understanding of the involved concepts.
You find the Connector-pin macro in the Symbol Insert Tool, in the a - Terminals… resource category, as shown in the figure below.
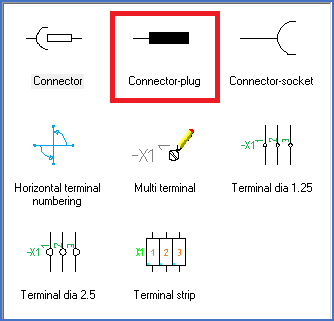
Figure 1130: Connector-pin
There are three variants of connectors:
•A combination of pin and socket
•Only pin
•Only socket
After selecting the pin variant, you click the first line, and thereafter the last one. In the same way as for terminals, you can click “before the first” and “after the last” line.
The direction of the pins will be determined automatically towards the closest end of the lines.
A dialogue box called Connector symbol dialogue will then appear.
Figure 1131: The “Connector Symbol Dialogue”
Start by entering Index and Connector name. Index can be typed or selected from the catalogue in the same way as for terminals. Connector name follows the same rules and settings as terminal group names.
Next, specify the first pin/socket number and a step value.
The Edit all attributes… button gives you access to all attributes in the connector symbol.
In the Appearance section of the dialogue box, you can select whether connector names after the first pin/socket should be left empty to enable inheritance or be made invisible to allow for a mixed horizontal and vertical way of drawing. You also can select the text height for connector name and pin/socket numbers.
Figure 1132: Simplified Connector dialogue
When inserting connector symbols, you will get a simplified connector dialogue box for all pin symbols except the first one. That dialogue is primarily intended for adjustment of pin numbers. You can also invoke the detailed dialogue box using the Detailed dialogue… button.
Figure 1133: The result