|
<< Click to Display Table of Contents >> Attribute adjustment tool |
  
|
|
<< Click to Display Table of Contents >> Attribute adjustment tool |
  
|
The Attribute adjustment tool is a very effective tool originally created to easily adjust attributes in multiple ways, like to move them around, change text heights, and much more. It has however been extended since then, and today it can be used to adjust text objects and attribute definitions as well.
It utilises a user interface type called "Steering Wheel". The figure below shows how it looks.
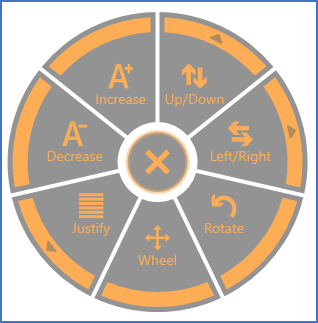
Figure 950: The Steering Wheel user interface of the Attribute adjustment tool
The Attribute adjustment tool is located in the Home tab of the ribbon menu, in the Text and Attributes panel, directly to the right of the Adjust text and attributes command.
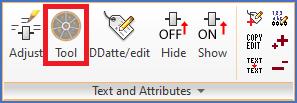
Figure 951: Location of the command in the ribbon menu
In the legacy Classic menu, the tool is found in the Modify pull-down menu, in the second section of the Edit text sub-menu.
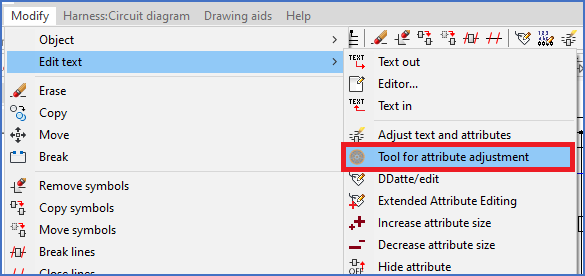
Figure 952: Location of the command in the legacy pull-down menu
The Attribute adjustment tool is also available directly in the Object Properties toolbar, to the right of the Hide and Show attribute commands and the command for Wire-number adjustment.

Figure 953: Location of the command in the legacy "Object Properties" Toolbar
After activating the Attribute adjustment tool, any number of attributes may be selected in a way similar to ordinary object selection but limited to attributes only. This means that both clicking on individual attributes and using windows or crossings are supported.
When the selection has been confirmed with the <RETURN> key (ENTER), the wheel is displayed.
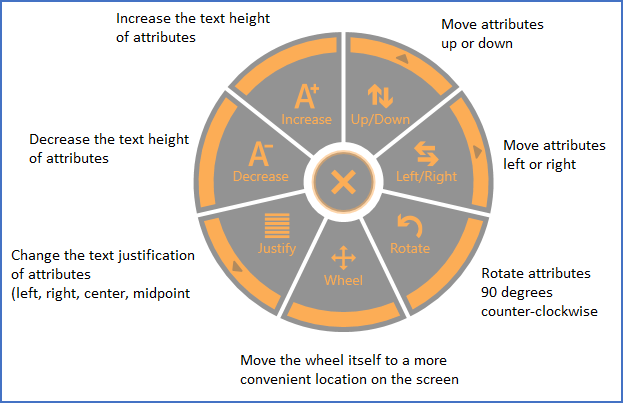
Figure 954: The "X" in the middle is used to exit the Wheel. The other options are described in the figure.
As shown in the figure above, nine options are available:
•Increase (text height)
•Decrease (text height)
•Up/Down (move)
•Left/Right (move)
•Rotate
•Justify (change justification)
•Wheel-move
•Exit (X)
All selected attributes will be treated equally.
•Increase and decrease text height is executed immediately without further ado.
•Rotate is also executed immediately. The selected attributes are rotated counter-clockwise 90 degrees for each click.
•Up/Down and Left/Right displays a second wheel where six options for the desired relative (to the text height) distance and direction are available, as well as a possibility to go home to the previous wheel.
Please refer to the figure below, which explains the options of the Up/Down wheel.
The Left/Right wheel works in exactly the same way, so there is no need to show it here.
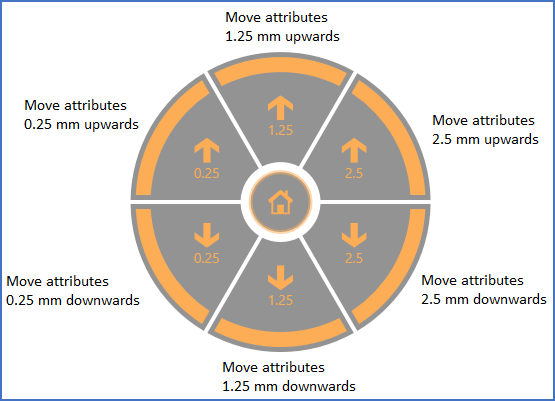
Figure 955: The options of the "Up/Down" wheel are shown here. Please note the "Home" button in the middle.
•Justify displays a second wheel where four options for the new text justification are available (Left, Right, Mid and Centre), as well as a possibility to go home to the previous wheel.
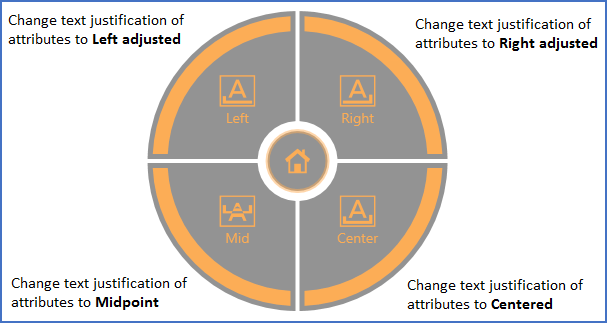
Figure 956: The options of the "Text justification" wheel are shown here. Please note the "Home" button in the middle.
•The Wheel-move option is used to place the wheel itself in a suitable position on the screen.
•The Exit option in the centre of the wheel is used to exit the tool.