|
<< Click to Display Table of Contents >> How the Script Generator is used |
  
|
|
<< Click to Display Table of Contents >> How the Script Generator is used |
  
|
To use an existing script sequence, either one of the standard ones that are included at delivery of the software, or one that you have created yourself, you should follow the steps described here.
First you activate the Script Generator by clicking the corresponding module icon in the upper part of the cadett ELSA main window.

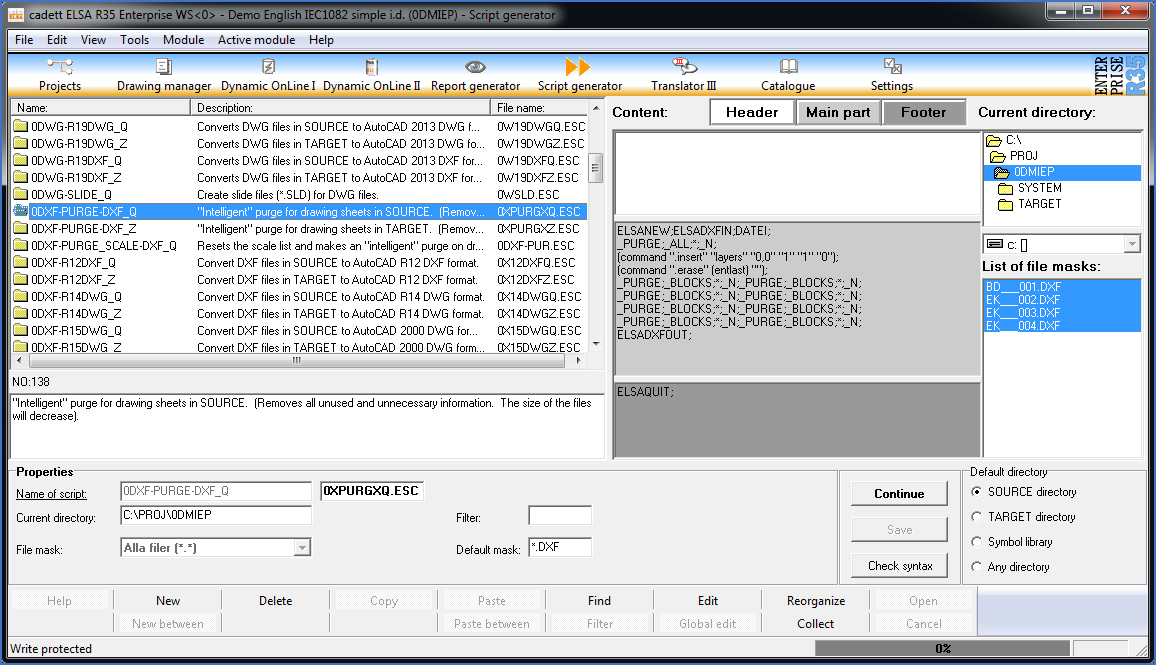
Figure 1930: The cadett ELSA Script Generator
The Script Generator will then be displayed, as shown in the figure above.
In the upper left part of the window you will find a list of all available script sequences with their names, descriptions and file names. The file name (with file type ESC = Elsa SCript) refers to a text file where the content of the script sequence is stored.
If you select a script sequence using a simple left-click with the mouse, the complete description of it will be shown directly below the list of script sequences.
If you open a script sequence, either by double-clicking it or selecting it and then click the Open button, the content will be displayed in the middle of the screen. There you will find three boxes corresponding to the header, the main part and the footer.
The default directory is shown in the lower right part of the screen. For the script sequence that is shown in the figure above, that is the SOURCE directory of the current project. That directory and its content of drawing sheets are illustrated in the right part of the window.
If you want to run the script sequence in question, you simply click the Continue button in the lower right part of the window. The Selected files dialogue box will then be displayed, which will show all selected drawing sheets.

Figure 1931: Add or remove in the list of selected drawing sheets.
In that dialogue box, shown in the figure above, you may add or remove certain drawing sheets from the list of sheets to process. Removed sheets will not be processed by the Script Generator, but will of course not be deleted. You may also add sheets from other projects and you can change the order in which the sheets will be processed.
•You remove drawing sheets from the list of sheets to process by selecting them and then pressing the Remove button.
•You add drawing sheets using one of the buttons in the Add section. Either you select arbitrary DXF files using the Files button, or you select drawing sheets of cadett ELSA projects specifically using the Project button.
•The sequence of the drawing sheets can be changed using ordinary “drag and drop”. This means that you select one of the sheets in the list, and then drag it to the position where you like it to be.
Assuming that you want to start the script sequence directly, you click the Start button as the next step. The Script Generator will then generate a script file with the actual commands, start AutoCAD and execute this script file.
You will see what happens directly on the screen, as it happens. When all drawing sheets have been processed in this way, the AutoCAD window will be minimized (or AutoCAD will be terminated) and you will get back to the Script Generator.