|
<< Click to Display Table of Contents >> Insertion point |
  
|
|
<< Click to Display Table of Contents >> Insertion point |
  
|
You return to the Symbol data main dialogue box.
Make a final check that everything is the way it should be.
Before confirming the content of the dialogue box with the OK button, please remind yourself that you must specify the insertion point before ending the process. If you miss that, the symbol will be useless.

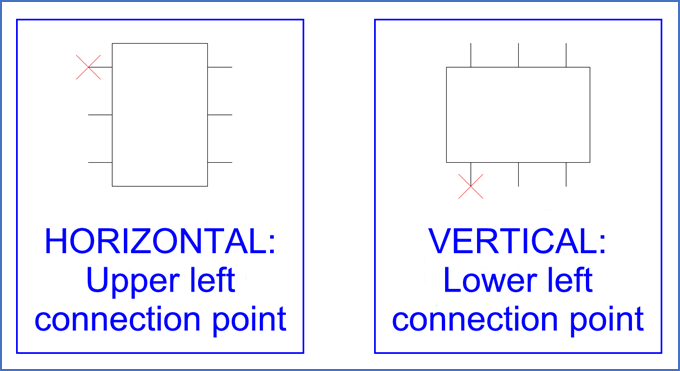
Figure 1274: Suggested placement of the insertion point
After you have clicked OK in the main dialogue box, you are asked to specify the insertion point of the symbol. In the figure above, suitable choices for this are shown. In fact, you can place the insertion point anywhere you like, but being consistent is a virtue. To place it in the same way as in the standard symbols is therefore not a bad idea.

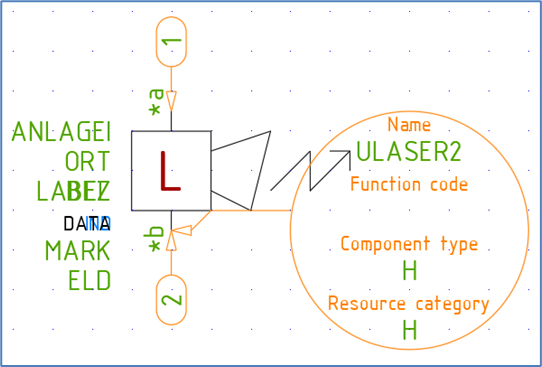
Figure 1275: Attributes and Symbol Object will be inserted like this.
When you have picked the insertion point, the selected attributes will be inserted next to the symbol. The Symbol Object will also be inserted, with the arrow-head defining the insertion point.